Start a rehearsal in five minutes
The bandleader creates the room, loads the music, and shares one four-digit code. Everyone else joins from their own device.
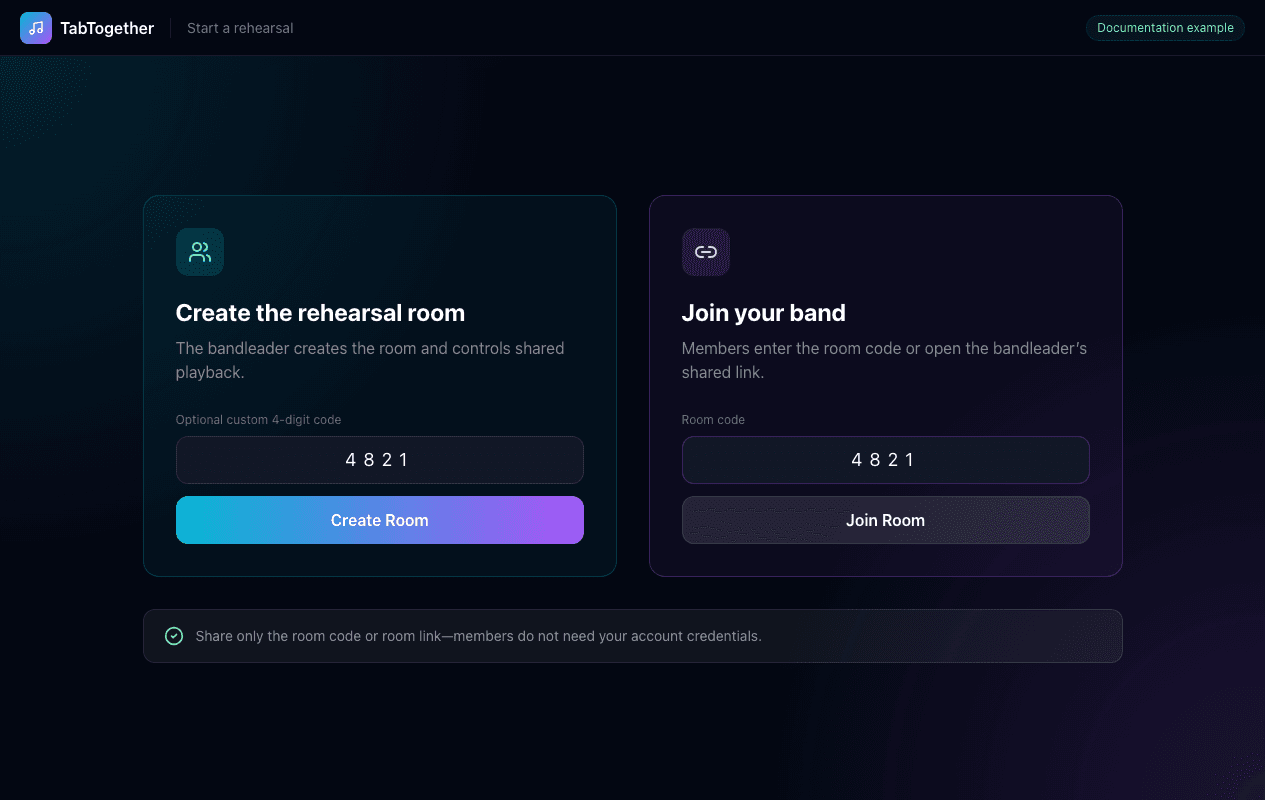
- 1
Sign in
Open TabTogether and sign in. Room creation, cloud tabs, and paid room capacity are tied to the signed-in account. - 2
Create the room
The bandleader can accept an automatically generated code or enter an unused four-digit code, then select Create Room. - 3
Invite the musicians
Share the four-digit code or copy the room URL. Never share your account password. - 4
Load a song
Choose a shared tab from Browse, open a saved local tab, or upload a Guitar Pro file. - 5
Verify everyone is ready
Confirm the participant list, assign score parts, and test playback before the count-in.
Know the rehearsal screen
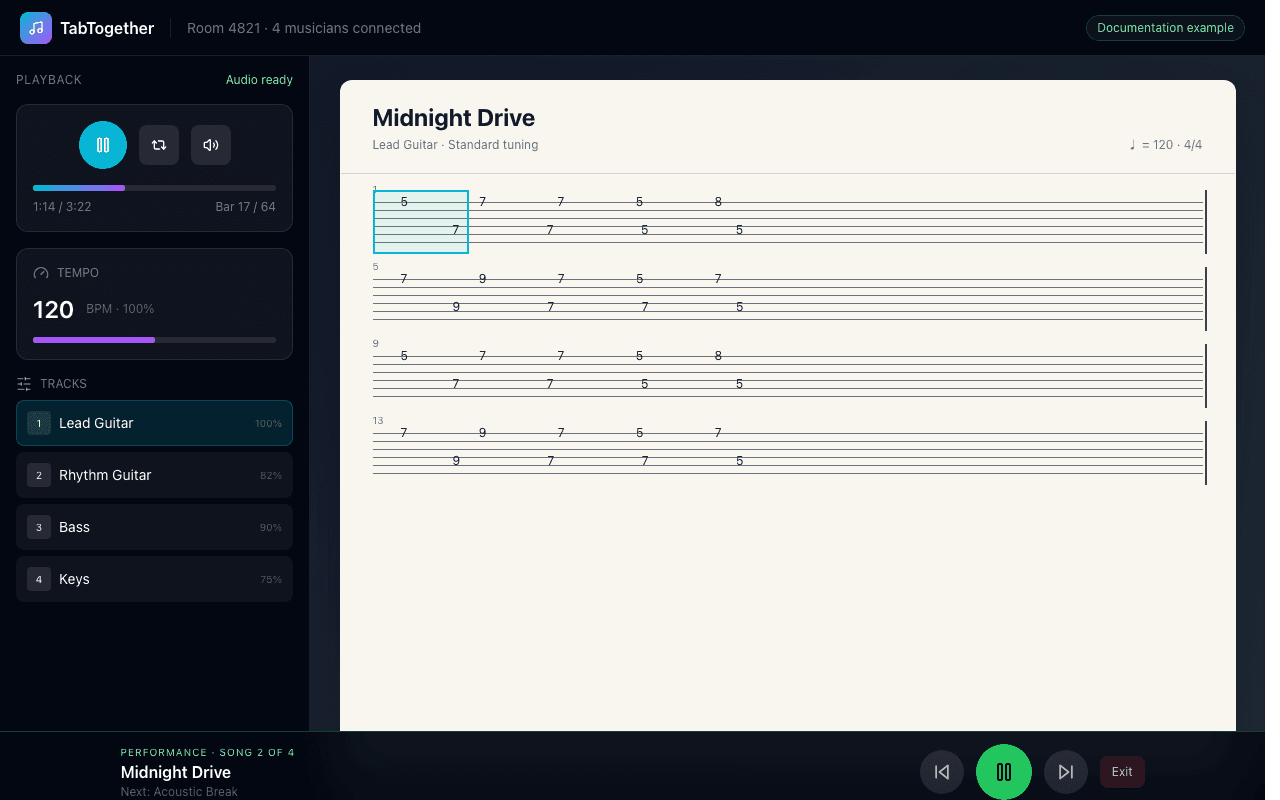
The score is the shared visual focus. The setup sidebar holds playback, tempo, tracks, band assignments, real audio, mixer routing, and the show setlist.
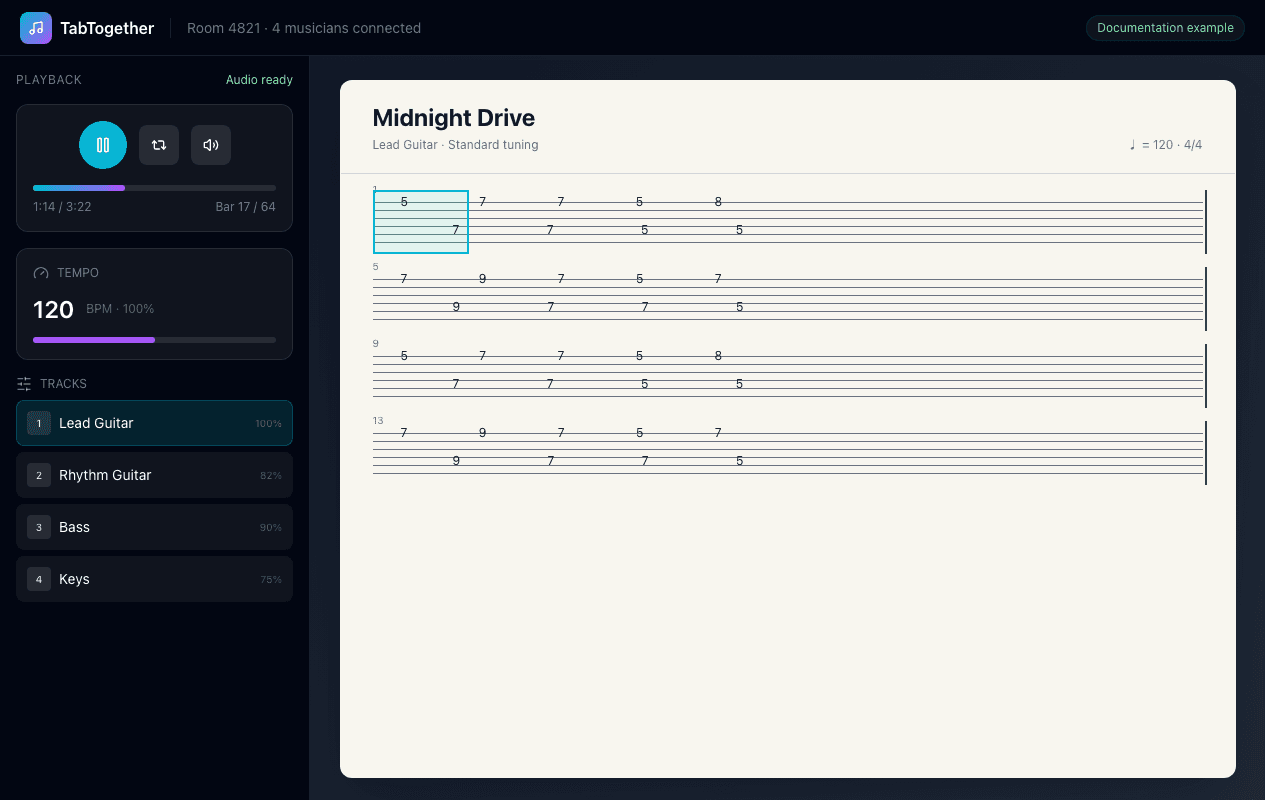
Playback
Play, pause, stop, seek, and view the current time and bar.
Tempo
Scale the written tempo while preserving tempo changes in the score.
Tracks
Choose the notation part and control MIDI mute, solo, and volume.
Band setup
Assign a role and score part to each connected musician.
Real audio
Attach and synchronize an original recording or backing track.
Show setlist
Arrange saved songs, run preflight, and enter performance mode.
Browse, upload, and save tabs
TabTogether supports Guitar Pro files and distinguishes community-shared tabs from files saved only in your browser.
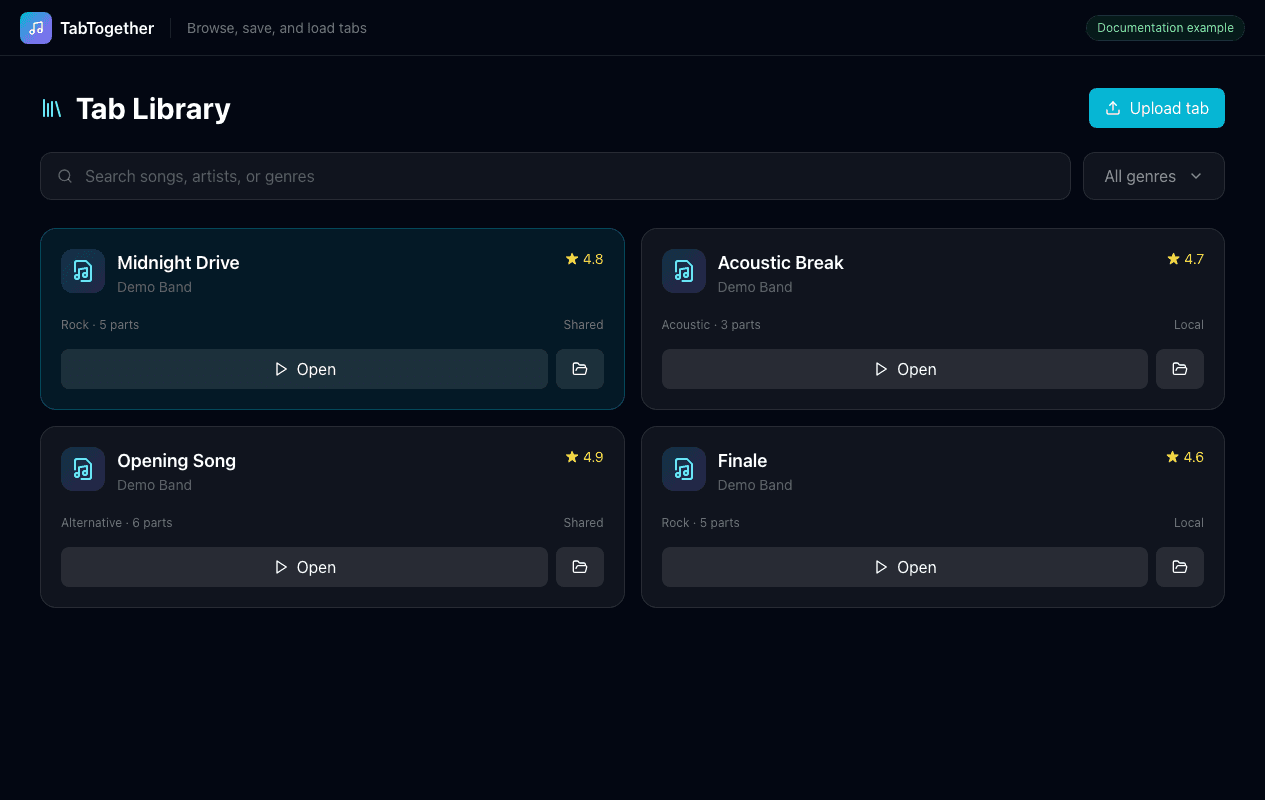
Shared library
Shared tabs can be opened from Browse, restored from a URL, and referenced safely in a setlist. Backing audio and approved sync points can be shared with other users.
Saved on this device
Local tabs are stored in this browser using IndexedDB. They do not automatically appear on another device, browser profile, or after site data is cleared.
Keep every device on the same bar
Room playback uses a shared server clock. Play, pause, seek, tempo, countdown, and file changes are distributed so each musician follows the same performance position.
- 1
Let everyone join before loading the final song
Connected members appear in Band Setup. Late joiners should receive the active shared file automatically. - 2
Use one authoritative bandleader
Avoid competing transport changes. In a local rehearsal, the mixer-connected owner should start and stop the band. - 3
Use count-in for coordinated starts
Enable Count-in before Play. The countdown BPM and scheduled start are synchronized across room devices. - 4
Leave when finished
Use Leave Room rather than only closing the tab. This clears the room connection and join parameters from the browser URL.
Playback, tempo, loop, and tracks
Use MIDI when learning individual parts. Switch to Original Audio when you want the feel and sound of the real recording.
Play and pause
Play starts every connected device on a scheduled shared time. Pause preserves the current position.
Tempo
The percentage scales the score’s written tempo. A 120 BPM score at 75% plays at an effective 90 BPM. Room tempo changes apply to everyone.
Metronome and count-in
Metronome adds a click during MIDI playback. Count-in displays and sounds the selected number of beats before the shared start.
Loop
Set the loop start and end around a difficult section, then repeat it while gradually increasing tempo.
Track mixer
Select the part shown in the score. Mute, solo, and volume controls affect synthesized MIDI tracks only.
Simple mode
Reduce visible controls when a musician only needs the essential score and transport interface.
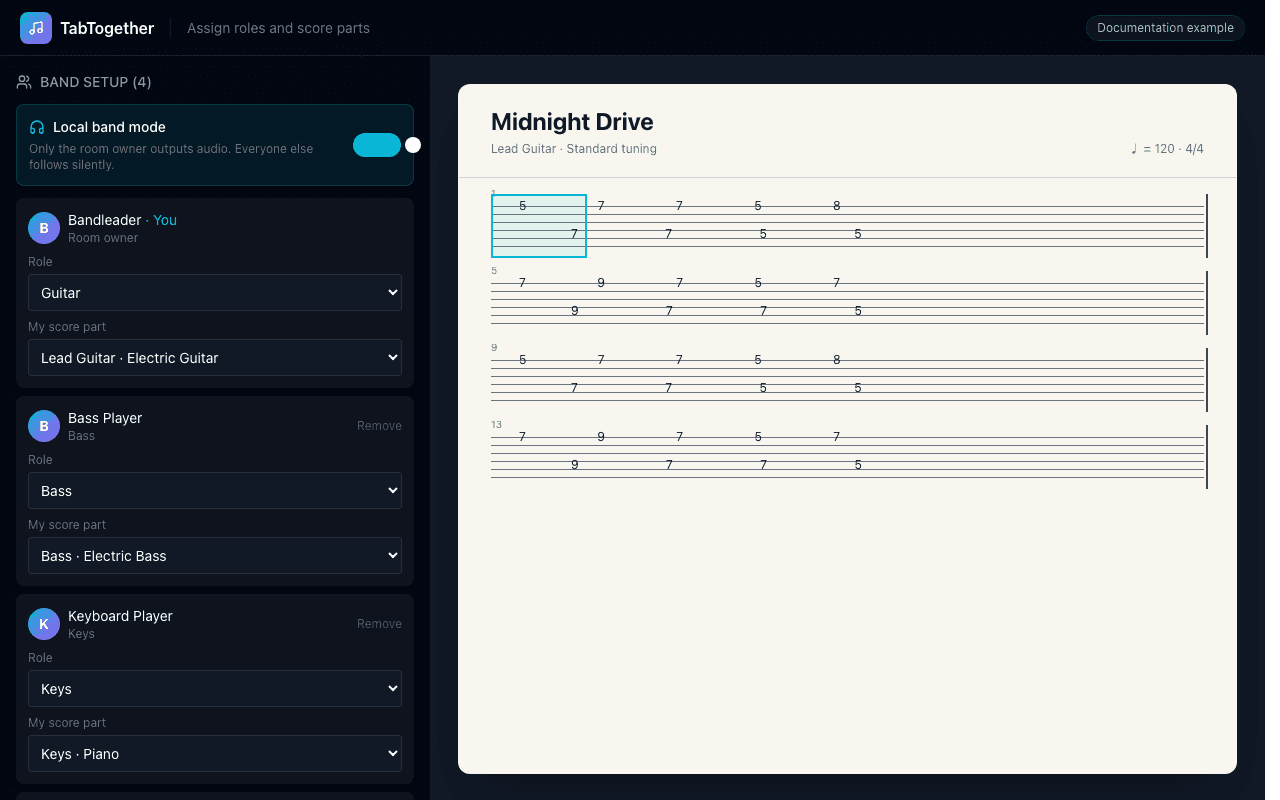
Give everyone the correct part
The room owner can assign every musician. Individual members can update their own role and score part.
- 1
Load the song first
Score-part menus are populated from tracks in the loaded Guitar Pro file. - 2
Choose each role
Select guitar, bass, keys, drums, vocals, or another role. This label helps the bandleader verify assignments. - 3
Assign the notation part
Match each musician to the exact Guitar Pro track they should see. The selected part opens automatically on their device. - 4
Enable Local band mode for one audio source
Only the room owner outputs audio. Member devices stay visually synchronized but silent, preventing doubled or delayed playback in the room.
Synchronize a backing track to the tab
A recording may contain silence, an intro, or natural tempo drift. One anchor fixes the starting alignment; Manual Sync adds anchors across the song when the recording drifts.
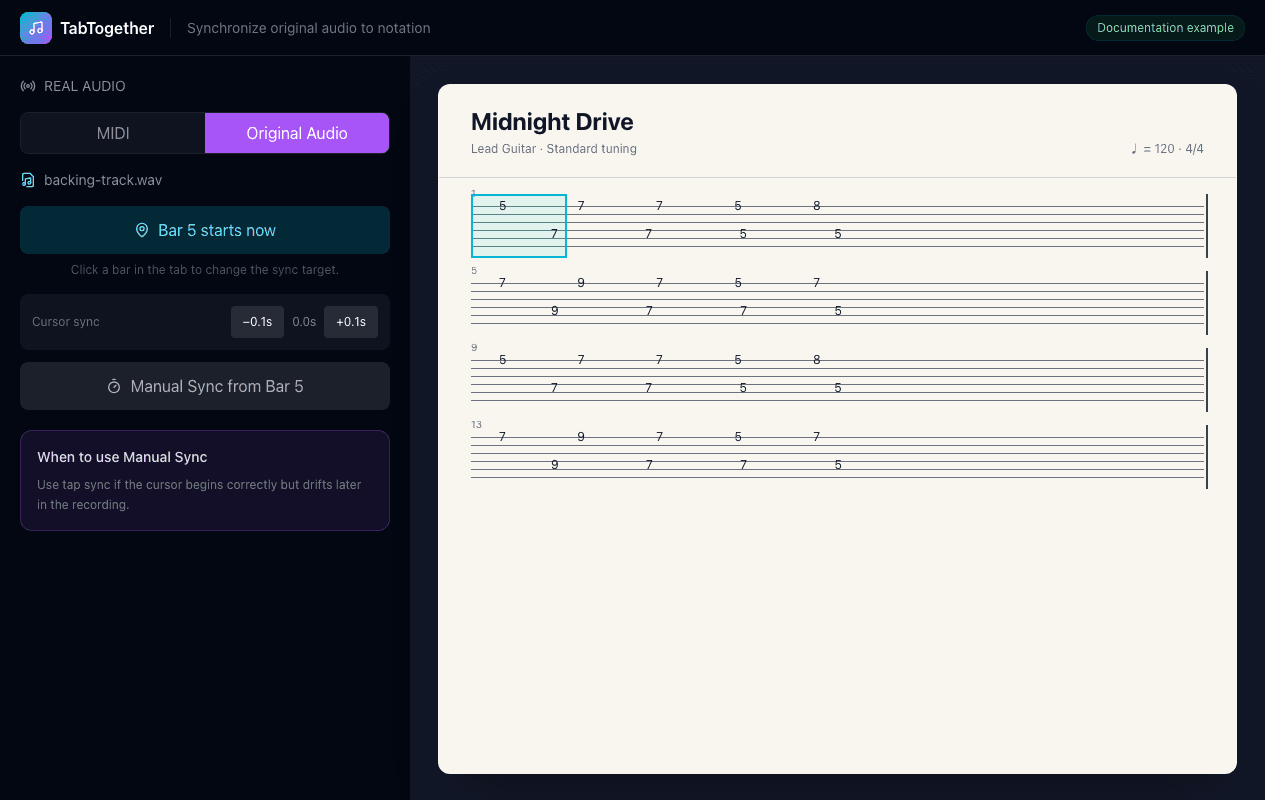
Set the initial alignment
- 1
Attach real audio
Use a confirmed shared backing track or upload an MP3, WAV, M4A, or OGG file. Select Original Audio. - 2
Select a recognizable score bar
Click the bar that matches a clear downbeat in the recording. The button updates to “Bar N starts now.” - 3
Move the recording to that exact moment
Seek to the matching downbeat, then select Bar N starts now. - 4
Fine-tune in 0.1 second steps
If the cursor is ahead of the sound, use +0.1s. If the cursor is behind the sound, use −0.1s.
Fix drift with Manual Sync
- 1
Start Manual Sync from the matching bar
Press Play and listen to the backing track, not the visual cursor, for each bar’s downbeat. - 2
Tap through the problem area
Press the TAP button or T exactly when you hear the backing track reach each new bar’s downbeat. TabTogether maps that heard audio moment to the next expected bar in the tab. - 3
Undo mistakes
Undo removes the last anchor without discarding the rest of the session. Restart clears the current tap session. - 4
Save Sync
For a shared tab, saved sync points become available to the community. Check the entire song before saving.
Feed backing and IEM-only audio to a CQ-18T
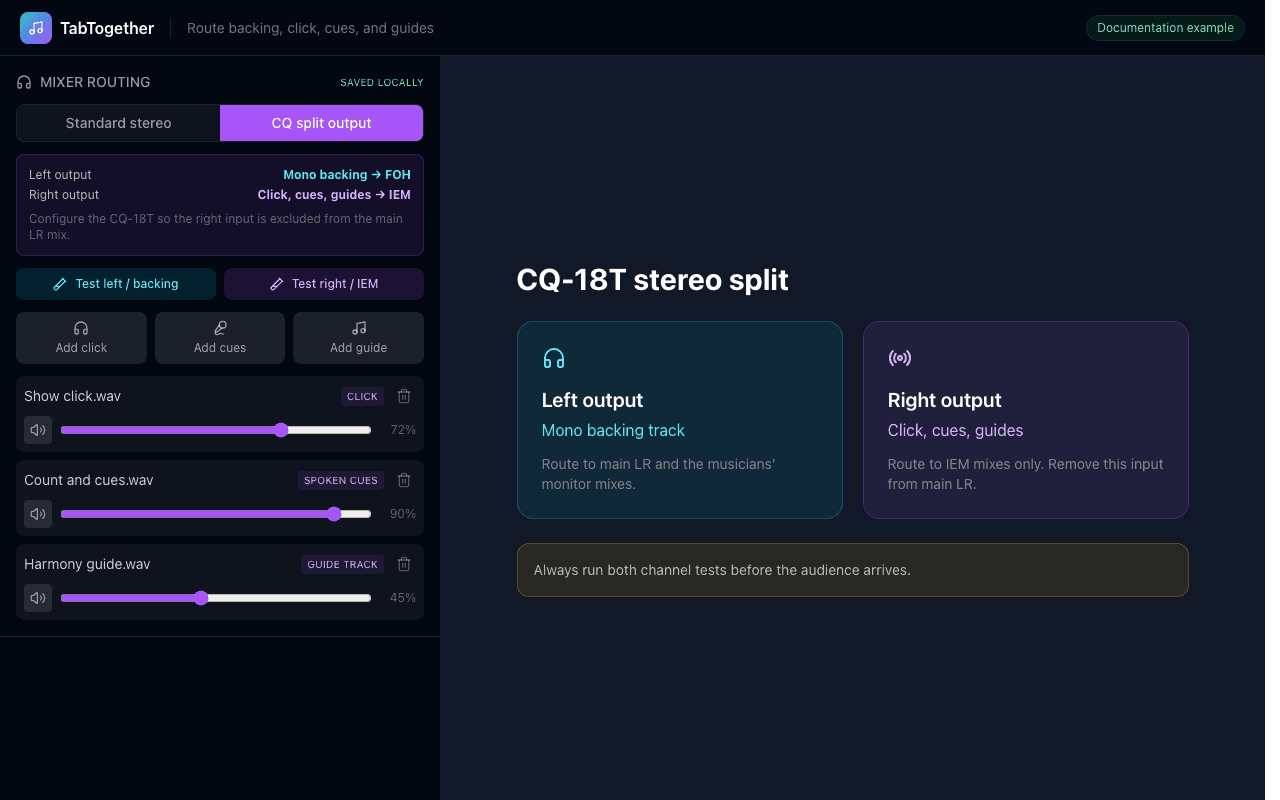
CQ USB stereo split uses the owner device’s normal stereo USB output: Left/USB 1 carries the backing track and Right/USB 2 carries click, cues, and guide tracks.
- 1
Connect the owner device by USB
Connect the room owner’s USB-C output directly to the CQ-18T USB-B input. Disable operating-system audio effects. - 2
Use an uploaded audio backing track
YouTube cannot pass through the browser routing matrix. Attach a local or shared audio file instead. - 3
Enable Local band mode
This prevents participant phones, tablets, and laptops from playing duplicate audio. - 4
Choose CQ USB stereo split
Left/USB 1 becomes the backing track. Right/USB 2 carries click, spoken cues, and guide tracks. - 5
Test one channel at a time
Run Test left / backing, then Test right / IEM, and watch the CQ USB input meters. - 6
Configure CQ sends
Send USB 1 to Main LR and desired monitors. Send USB 2 to monitor/IEM mixes only and remove it from Main LR.
| Browser / USB channel | Content | CQ destination |
|---|---|---|
| Left / USB 1 | Backing track | Main LR + selected monitor mixes |
| Right / USB 2 | Click, cues, guide tracks | Monitor/IEM mixes only |
Build a setlist and enter performance mode
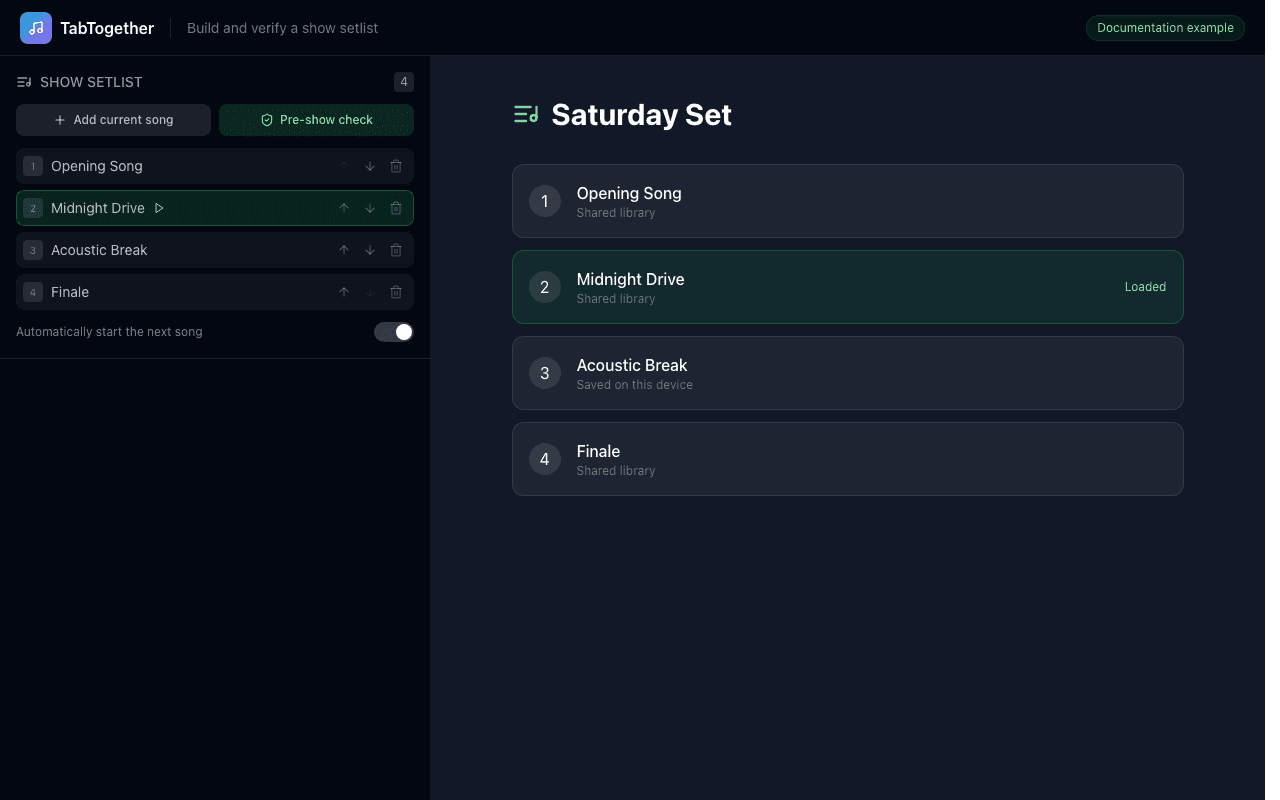
Setlists keep durable references to shared or saved-local songs. Preflight blocks unsafe starts, and performance mode replaces setup controls with a stage-safe transport bar.
- 1
Add durable songs
Open each shared-library or saved-local song and select Add current song. - 2
Arrange the show order
Use the up and down controls. Select a title to load it and verify the correct score, audio, routing, and assignments. - 3
Decide how songs advance
With autoplay off, the bandleader starts each song. With autoplay on, the next entry begins after its audio engine is ready. - 4
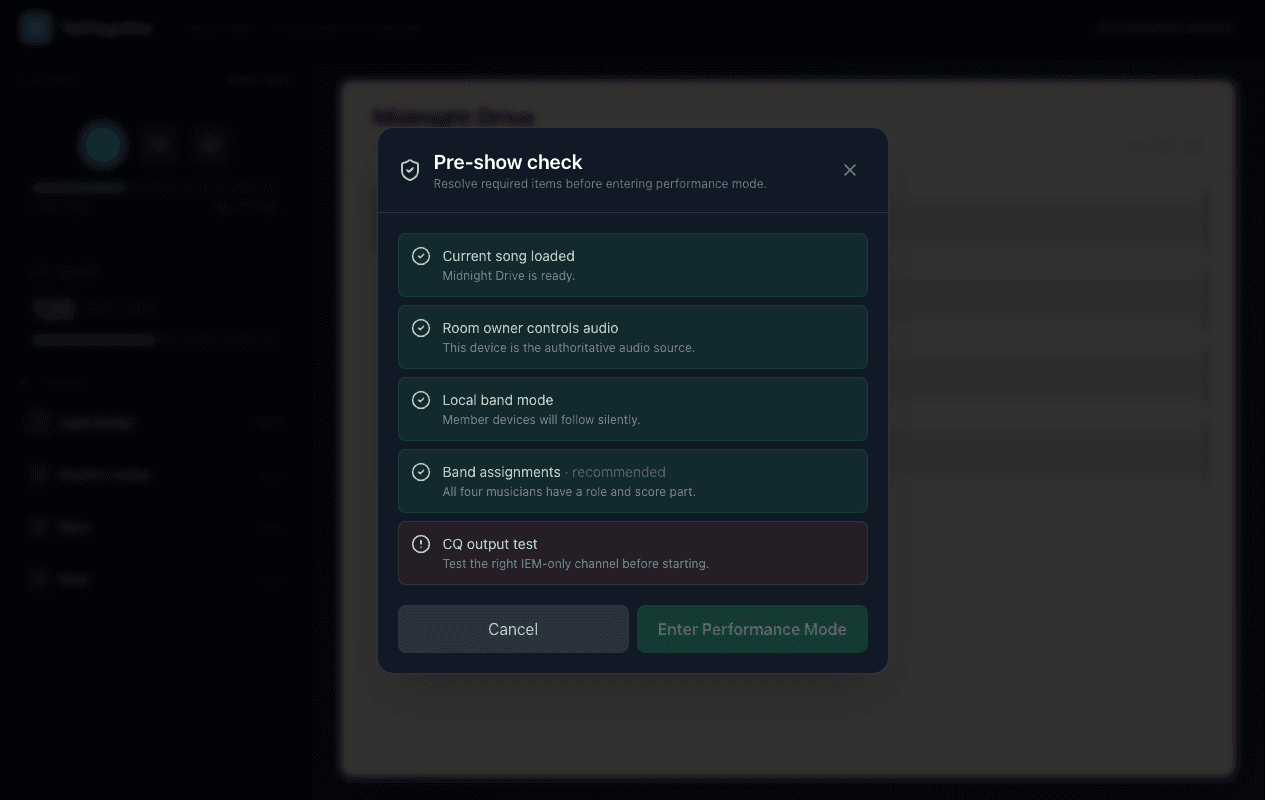
Run Pre-show check
Resolve every required failure. Recommended items can remain incomplete, but should be reviewed deliberately.
Use synchronized lyrics and vocalist view
Lyrics may come from the Guitar Pro file, an approved community contribution, or the lyrics editor.
- 1
Load the shared tab
TabTogether checks for approved contributed lyrics and embedded Guitar Pro lyrics. - 2
Open Lyrics
Toggle from notation to the full-screen lyric view. Current lines follow the playback position when timing information is available. - 3
Assign the vocalist role
In Band Setup choose Vocals. If lyrics are available, that member automatically receives vocalist view; the score part is optional. - 4
Add missing lyrics carefully
Use the lyrics editor on a shared tab. Preserve section labels such as Verse, Chorus, Bridge, and Solo, and verify text before submitting.
Record the room
Capture rehearsal audio from your device microphone for review after practice.
Session recording
- Allow microphone access.
- Select Record before rehearsal.
- Stop when finished.
- Save the downloaded WebM audio file.
Recording captures the microphone input, not a direct internal mix of browser backing audio. Availability depends on plan and browser support.
Use phones, tablets, and keyboards
Mobile layouts prioritize the score and transport. For dense notation, a tablet or laptop in landscape orientation is easier to read on a stand.
- Keep the screen awake and connect power for long rehearsals.
- Use a stable rehearsal Wi-Fi network; avoid switching networks mid-song.
- Open Tracks to reveal the setup sidebar on smaller displays.
- Use Local band mode so member devices remain silent in the rehearsal room.
Keyboard shortcuts
Frequently asked questions
Start with the symptom you can see or hear, then verify the simplest part of the signal or synchronization path first.